
The latest version of KAPE (0.8.2.0) includes several updates, including improvements to the ConsoleLog, automatic sync options with the KapeFiles GitHub repository, and much more.
One of the most exciting enhancements is in the graphical user interface, which can be accessed via gkape.exe included in the KAPE download package. This post will provide you with an overview as well as instructions to get started today.
(The full changelog is included in the KAPE package, which you can download here. If you’ve already downloaded KAPE, use the same download link included in the confirmation email.)
Wrapping KAPE in a graphical interface
Gkape.exe starts a graphical interface that wraps the command line version of KAPE. It expects to be:
- executed from the same directory as the main KAPE executable (kape.exe) and
- run with administrator privileges.
Beyond running KAPE, gkape.exe contains an editor for Target and Module configurations, including automatic validation of configuration files. This enables you to start with an existing template, make some adjustments and then save the updated configuration to a new name.
Gkape.exe looks like this when launched:
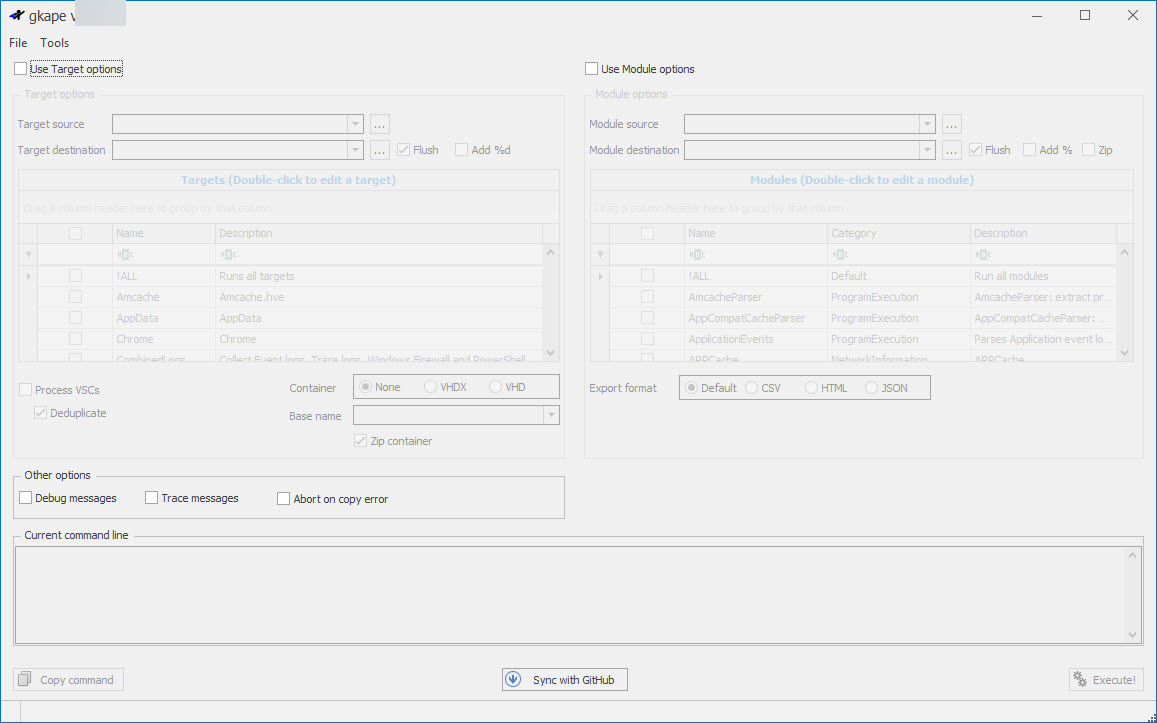
The interface consists of several sections, which are explained in greater detail below. At the top of each main section are checkboxes for Use Target options and Use Module options. Checking one or both of these unlocks the section below.
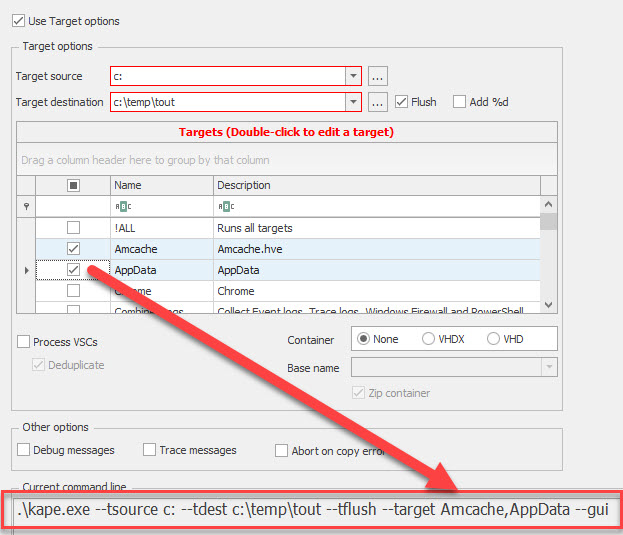
Note that while interacting with the various sections in gkape.exe, the current command line box at the bottom will display the equivalent command line. In fact, this is the exact command that will be executed when all minimum requirements are met. As options are selected, gkape.exe determines if all required properties are set. When this is true, the Execute and Copy command buttons are enabled.
Clicking the Execute button launches kape.exe with the displayed command line. A new window is displayed, showing what KAPE is doing. When KAPE is finished, press any key to close the window and return to gkape.exe.
Clicking the Copy command button copies the entire displayed command line to the clipboard. This enables you to then paste the command into PowerShell or CMD to execute.
NOTE: Gkape.exe adds the “--gui” switch to the command line, which displays the "Press any key to exit" dialog when KAPE is done running. If you plan to use gkape.exe to build the command line for use in a batch file, remove “--gui” or KAPE will not exit without a key press.
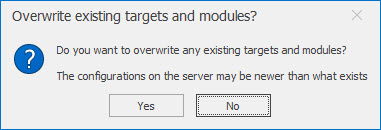
Finally, at the bottom middle of the gkape.exe window is a Sync with GitHub button. Clicking this button enables you to update the local Target and Module configurations with what is available at https://github.com/EricZimmerman/KapeFiles.
Clicking this button prompts for whether or not to overwrite any existing configuration files that exist locally. Selecting Yes overwrites local files, which is designed to make sure you have the most current versions of all configurations. Selecting No will skip any configuration files that exist locally. In most cases, Yes is the correct choice to ensure your configurations are the most accurate and complete.
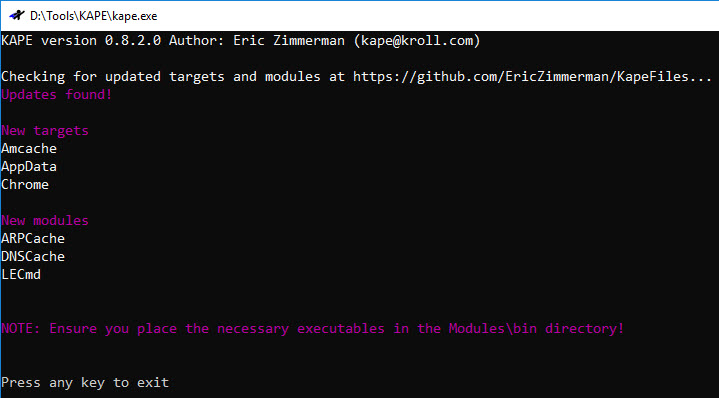
Once gkape.exe updates (and also when overwriting local data), any new Targets and Modules will appear as shown in the screen below:
Target options
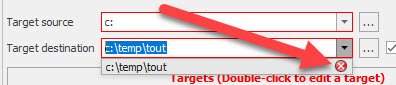
The Target options section will look like the screen below. Anything indicated in red is a required field. For Target source and Target destination, type a path, or use the “…” button next to the box to select a path. Gkape.exe remembers the paths that have been previously entered, so typing in the box will show matches. The dropdown can also be used to view and select previous entries.
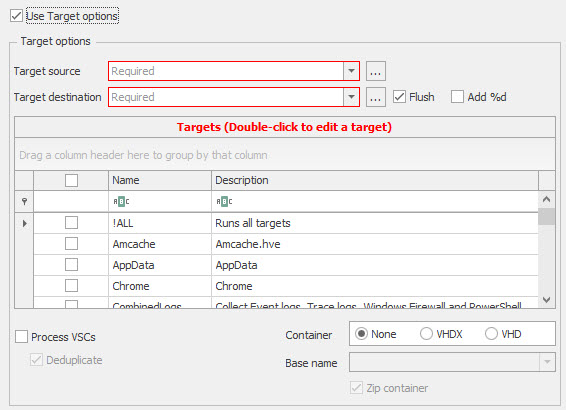
To remove an entry, click the X to the right of the entry when the dropdown is showing.
In the Targets grid, the checkbox to the left allows for selecting one or more Target configurations from the list. The columns at the top can also be used to sort and filter the list. As options are selected, the command line is shown at the bottom of the interface:
Module options
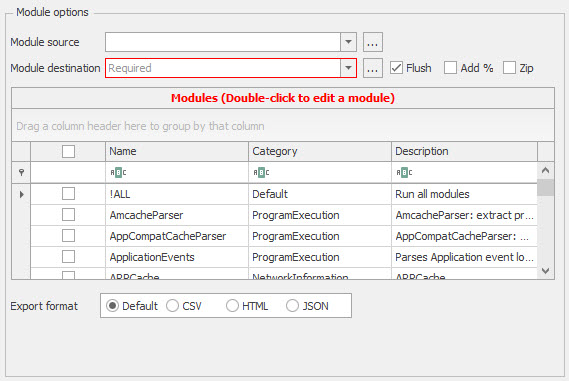
Once again, areas shown in red in the Module options are required fields. When using the Target options at the same time as the Module options, note that in almost every situation leaving the Module source path empty is correct because KAPE will then use the Target destination value for Module source.
Other options
These options shown below allow for displaying debug and trace messages, as well as aborting when KAPE encounters an error while copying:

Editing Target and Module configurations in the graphical interface
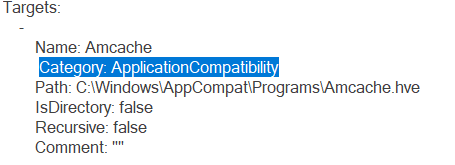
To edit a Target or Module configuration, double-click on a Target or Module's name in the grid. The Editor is then displayed. Here we see an example for the Amcache Target:
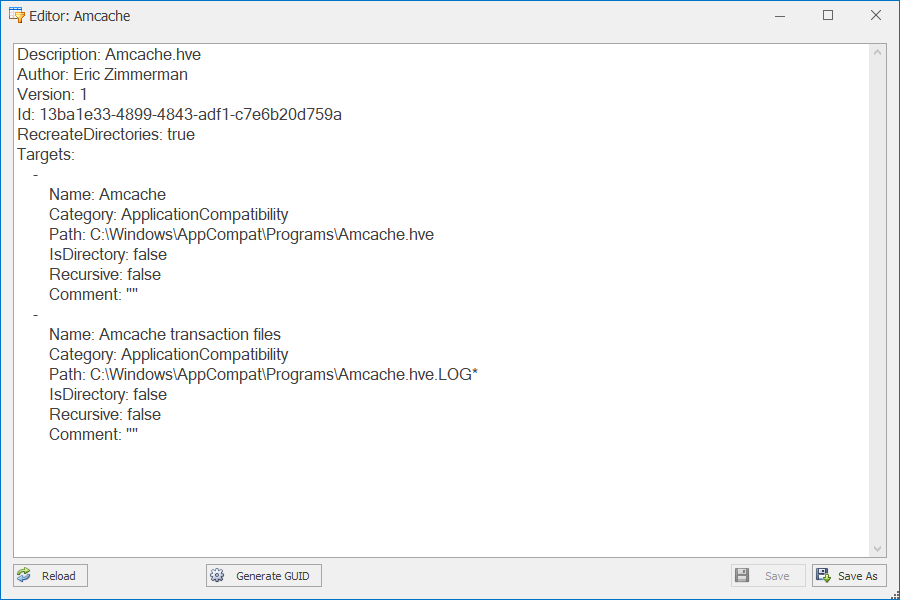
From here you can adjust the configuration as needed. Any time the data has changed, the Save button will be enabled. Clicking the Save button validates the configuration. Any errors must be corrected before you will be able to save the configuration.
In the example below, there is an extra space after the Name column. Clicking Save shows this validation error:

Once the OK button is clicked, the Editor will do its best to highlight the invalid data as shown below. After the issue is corrected, the Save button will overwrite the existing configuration with the new data.
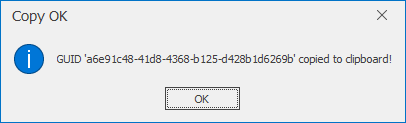
Use the Save As button to save to a new file. Be sure to update the GUID when using Save As. The Generate GUID button will generate a new, random GUID and copy it to the clipboard.
Get started
Download the latest version of KAPE here; if you’ve already downloaded KAPE, use the same download link included in the confirmation email.
Stay Ahead with Kroll
Computer Forensics
Kroll's computer forensics experts ensure that no digital evidence is overlooked and assist at any stage of an investigation or litigation, regardless of the number or location of data sources.
24x7 Incident Response
Kroll is the largest global IR provider with experienced responders who can handle the entire security incident lifecycle.
Office 365 Security, Forensics and Incident Response
Digital forensic experts investigate hundreds of Office 365 incidents per year and help strengthen your security.
Data Recovery and Forensic Analysis
Kroll's expertise establishes whether data was compromised and to what extent. We uncover actionable information, leaving you better prepared to manage a future incident.
Cyber Risk Retainer
Kroll delivers more than a typical incident response retainer—secure a true cyber risk retainer with elite digital forensics and incident response capabilities and maximum flexibility for proactive and notification services.